Developing in Hugo on Codio
To ease development of webpages using Hugo, I have developed a stack in Codio that contains Hugo preinstalled. Using this stack, we can quickly create a project in Codio to handle development of these web pages.
Note
You can also install Hugo locally on your own system and do this development anywhere. I use Hugo installed via Windows Subsystem for Linux on Windows 10, but it also works well in Ubuntu and Mac. I recommend downloading Hugo binaries directly from Hugo Releases as they are the most recent. This site requires Hugo v0.54 or later
Configure Codio Project for Developing Hugo Website
1. Create a New Codio Project using CC Hugo Stack
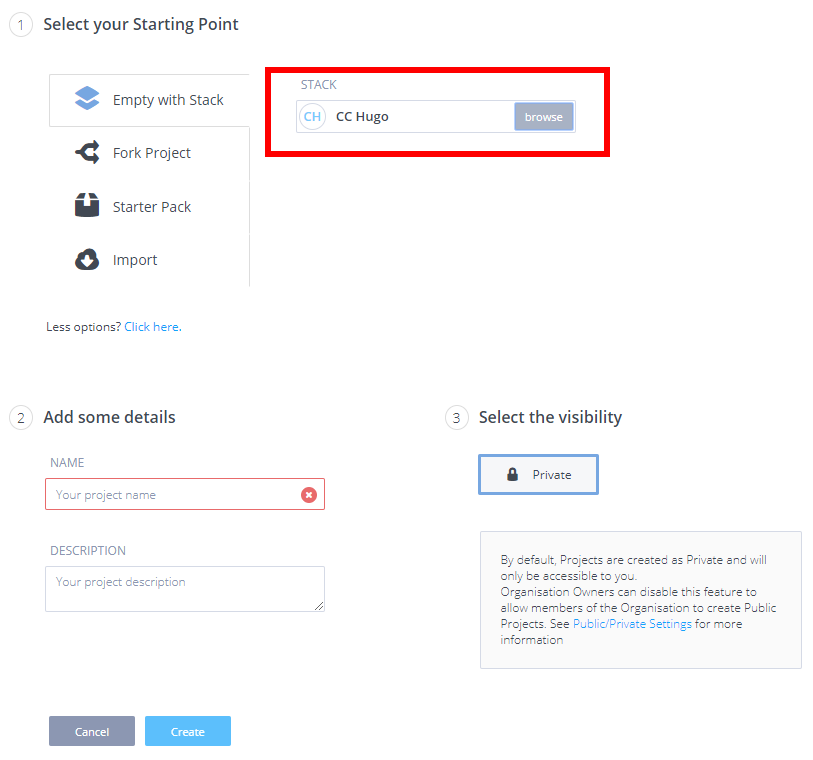
In Codio, click the “My Projects” link to the left, then click the “New Project” button in the upper right.
On the page that appears, select the correct stack for the project. For this project, we’ll need the CC Hugo stack. It contains a recent version of Hugo preinstalled on Ubuntu 18.04.
You can also give your project a name and description.
Finally, you should make sure the project is private to you - this helps avoid any confusion.
2. Clone Website Git Repository
Once you have created the Codio project, open the terminal and clone the desired Git project into the /home/codio/workspace directory. The repository should create a subfolder that contains its contents.
git clone <url>
For the main CC website, the output should be similar to the following
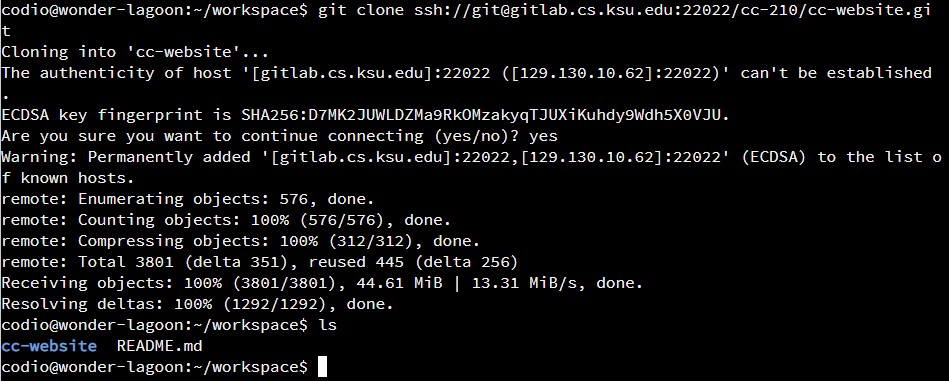
That’s all there is to it! From there, you can open the website folder, and browse the files. Most editing will happen in the content folder.
Preview Website
3. Find the IP address of the Codio Project
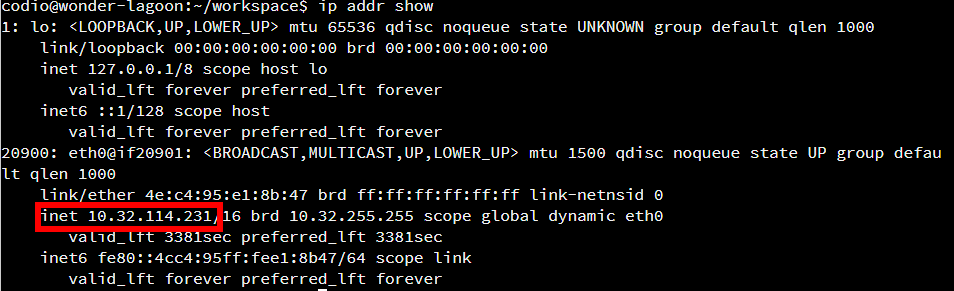
In the terminal of the Codio project, run the following command to find the IP address of the Codio box:
ip addr show
The IP address should be listed in the output, in a location similar to what is shown below:
4. Start Hugo Server on that IP Address
From within the root directory containing the Hugo website files, we can start a test server to browse the content of the site:
cd ~/workspace/cc-website
hugo server --bind <ip address>
The output should be similar to the following:
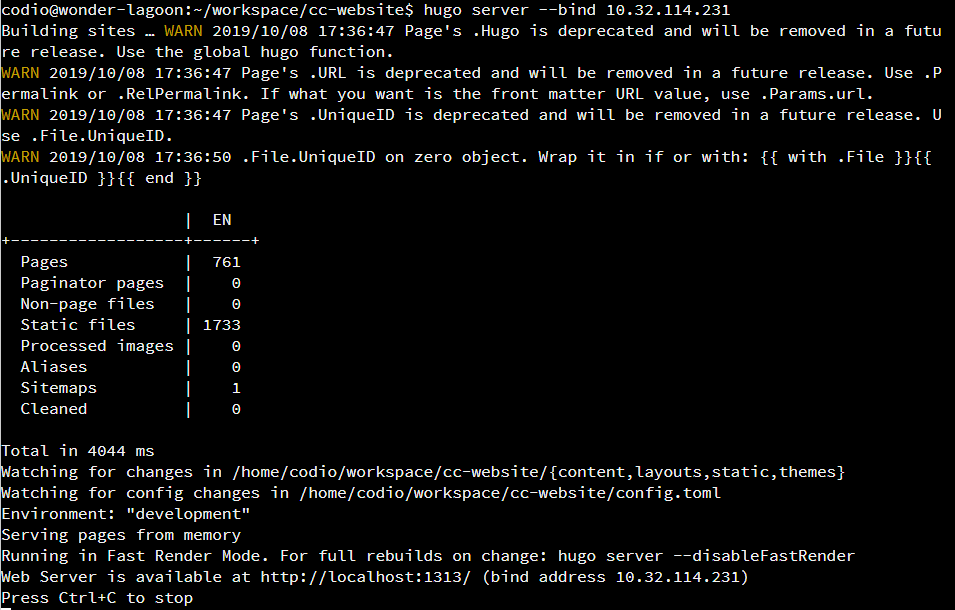
That will start a development server for Hugo. You can leave it running in the background as you make changes. Any changes to the site will cause it to automatically refresh and display the latest content.
5. Access Codio Box URL
To access the development site, we need the 2 word name of the Codio box, which can be found on the command prompt:

We can use that name to generate the following URL
<word1>-<word2>-<port>.codio.io
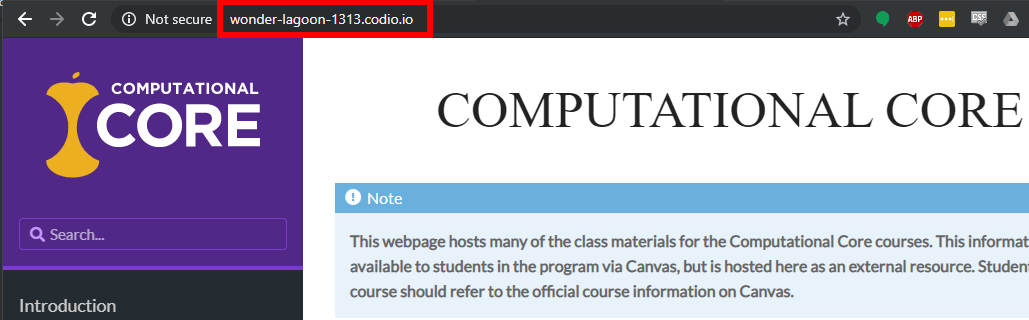
In this case, we want the following URL:
wonder-lagoon-1313.codio.io
When we visit that page, we should see our development server running:
You can also find the Codio Box URL from the Preview menu at the top of the Codio IDE toolbar:
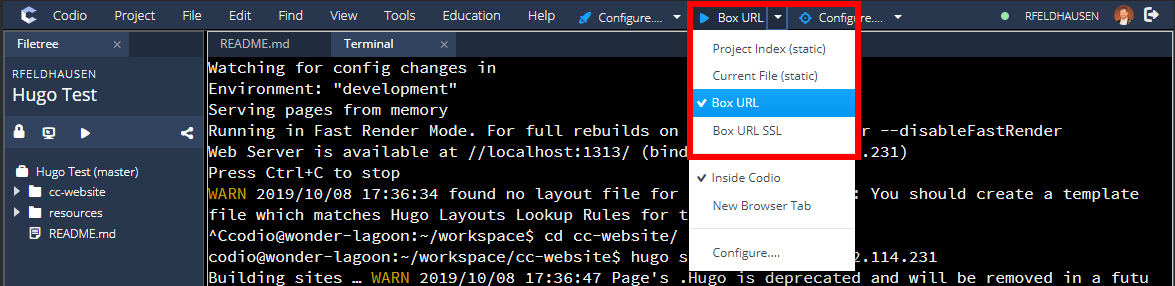
That will open a web browser tab to the current Codio URL on port 3000. You’ll just have to modify the port contained in the URL to 1313.
Pushing Changes to Live Website
1. Preview Changes via Development Server
Before uploading any changes via Git, please preview them carefully via the development server. Once you push your changes to Git, they are automatically updated on the live site. That site is used by many different classes, so we want to avoid any issues if at all possible.
2. Commit and Push via Git
Once you have made your changes, use the standard Git process to commit and push your changes to the master branch. If you have created your own branch, you may submit a merge request to have it merged with master.
3. View Live Changes on Website
Once you have committed and pushed your changes to the master branch, the live website should be updated within 1 minute. The process is automated (see below)
Updating Live Website
Warning
This process is automated via a DigitalOcean Droplet owned by Russ. Provided it is running, the live site should be updated automatically after any changes are made to the source repository’s master branch. However, if that process is unavailable for any reason, the instructions below can be used to update the live site. See the file deploy.sh in the root of the source repository for the script used to automate this deployment.
1. Check Out HTML Repository
Each of the Hugo websites has a corresponding HTML repository. It will need to be cloned into its own folder in the same directory as the main website:
cd ~/workspace
git clone <url>
This process assumes that both the source website and the HTML website are in sub-directories within the same directory (side-by-side). The scripts below assume both directories are in the ~/workspace directory
2. Clear HTML Repository
In the HTML repository directory, delete all files and clear the Git index:
cd ~/workspace/cc-website-html
git pull
git rm -rf .
git clean -fxd
3. Git Pull Latest Copy of Source Files
Next, in the source repository directory, get the latest updates and submodules:
cd  ~/workspace/cc-website
git pull --recurse-submodules
4. Render Hugo Site
In the source repository, run the hugo command to render the site. The configuration file automatically redirects the output to ../cc-website-html
hugo
5. Commit HTML Changes
Once the site is rendered, commit and push changes to the HTML repository:
cd ~/workspace/cc-website-html
git add .
git commit -m "<message>"
git push -u origin master
6. Deploy Changes on Live Site
Finally, go to the CS Linux Systems, and pull the latest version of the repository into the /web/core directory. You may have to work with the CS sysadmins to get access to that directory, as well as configure your own SSH key on CS Linux and add that key to the GitLab server.
ssh <username>@cslinux.cs.ksu.edu "cd /web/core && git pull"
That’s it! That will update the live website if the automated process is not working.